

You'll need a block. I work with linoleum; strong enough to take the beating of constant printing and scrubbing since the fabric paint I use is quick setting. I'm fortunate to have an art store here in our little town of Astoria with a good supply of block printing materials. You can shop there too! Dots & Doodles.
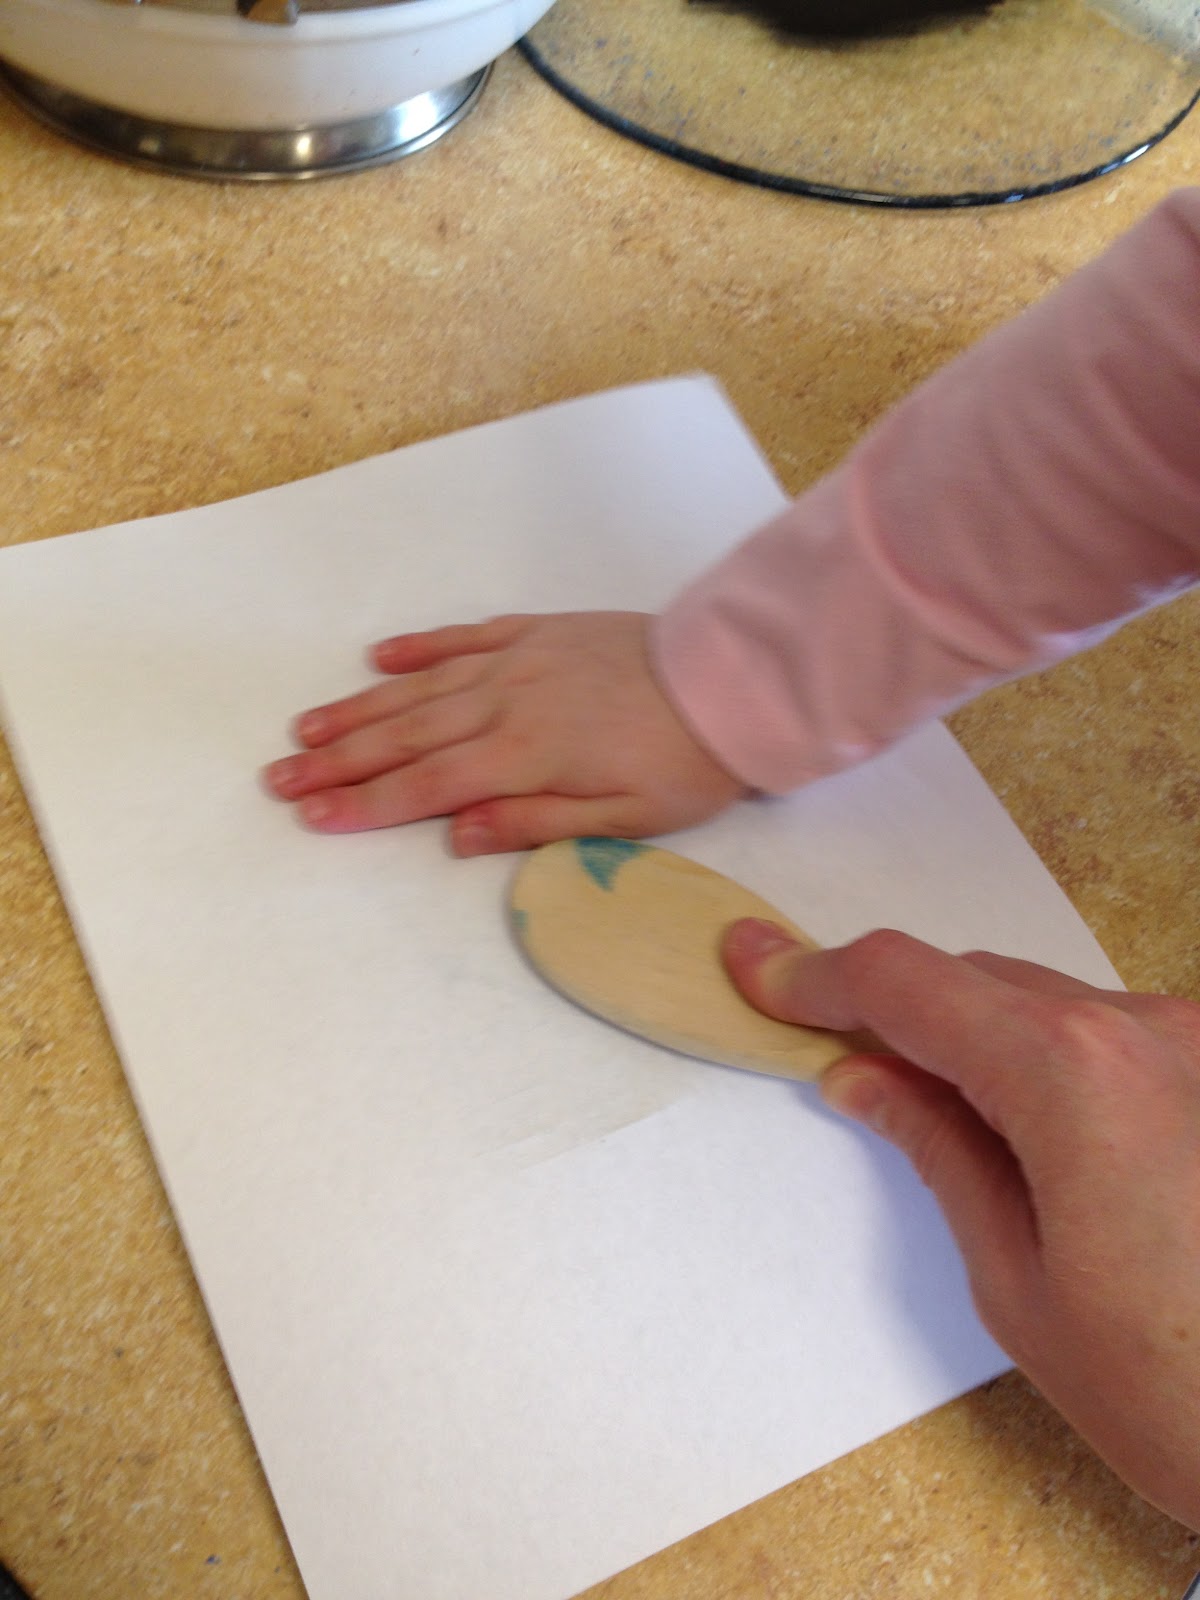
After choosing block size, you can either sketch straight onto the lino, or on paper. If you choose to draw on paper (this is the easiest way to transfer letters, rather than writing backwards) use a fairly soft sketching pencil. Place your drawing over the block face down, and rub the paper with a wooden spoon. This should transfer your drawing, and you're ready to carve.

With my carving tools, I keep a tube of superglue. After a few careless accidents, I've learned a little trick: DIY Dermabond.


Make sure the cut is clean, squirt superglue onto a Q-tip, rub over the wound, and let air dry. Be careful while carving! Always cut away from your body & appendages.

Since I also print on soft cotton onesies and shirts, my carving is deeper than needed for printing on paper.
 | ||
When you feel like you're done carving, it's time to print!

You'll need a flat surface for rolling your ink. I use a glass cake plate. Just squeeze a little ink on your smooth surface, roll the ink around with your brayer, then roll the ink onto your block.


Place the block onto your paper, or paper onto your block, and rub the paper with a wooden spoon.

Peel the paper off, and Voila, your beautiful creation! You are now a block printer!

OK - that is super cool and a great tutorial! Maybe I can get my mom to draw something cool for me to try! Otherwise, I will spend my free time block printing lame-oh smiley faces. :) Cheers.
ReplyDeleteI'm SURE you're more artistic than you're giving yourself credit for. Have fun!
ReplyDeleteThe Quality begins with using only the finest natural material that is respectful of the traditional craftsmanship, while being mindful of the working conditions of everyone involved in the creation of each piece.
ReplyDeleteBlock printing|Block Printing on Cloth | Block Printing Classes in Bangalore